In this blog post, I share how I converted my old laptop into a private Google Photos alternative. It’s a rewarding weekend project for tinkerers and a great way to reuse old tech meaningfully!
The Goal
- Set up Immich, a private photo and video backup server
- Recycle old hardware for a meaningful purpose
- Move away from Google
The Hardware
Any old laptop or desktop lying around at home should work, but make sure it has a 64-bit architecture to run smoothly. As long as it has at least 4GB of RAM (a requirement for Immich) and an Ethernet port, you’re good to go!
Here’s my setup:
- Laptop: HP Notebook with Intel Celeron N2830
- Memory: 8GB DDR3
- Storage: 500GB hard drive
It’s nowhere near powerful by today’s standards- but thanks to Linux, it’s more than capable of running a self-hosted media server.
Before Starting
We’ll be wiping the drive clean, so back up any important data first. Also, have a USB stick ready, as we’ll use it to install the server OS.
OS Setup
We’ll be installing Ubuntu Server, which comes without a graphical user interface. This helps preserve system resources by not rendering a desktop environment.
Download the latest LTS version of Ubuntu Server here: https://ubuntu.com/download/server
Tip: In the Alternative downloads section, choose a mirror close to your location for faster download speeds.
After downloading, use a tool like Rufus to create a bootable USB with the ISO file.
Boot into Live OS
Find out the boot menu key for your laptop model (usually F12 on Lenovo, F10 on HP, etc.).
Plug in the USB, power on the laptop, and press the boot menu key repeatedly to open the boot menu. Select your USB drive, typically listed as UEFI flash drive or similar.
When the GRUB menu appears, choose: Try or Install Ubuntu Server
Installing Ubuntu Server
Follow the setup wizard to configure your OS. Most options can be left at their defaults or set as you prefer.
One important step:
Uncheck the option to “Set up this disk as an LVM group.”
LVM (Logical Volume Manager) isn’t needed here, since we’re using the entire disk without partitioning.
Configuring a Static IP
At this point, you should have a working Ubuntu Server install. Congratulations! Your old laptop is now a server.
Next, we’ll ensure the server always gets the same IP address from your Wi-Fi router.
On another device connected to the same network, open a browser and visit your router’s configuration page (typically
http://192.168.0.1/orhttp://192.168.1.1/).On the server, run:
ifconfig(Install with
sudo apt install net-toolsif needed)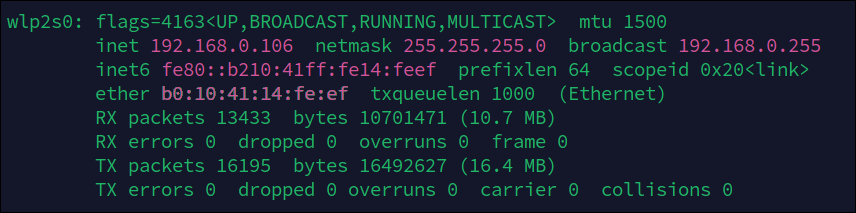
Note your laptop’s MAC address and the currently assigned IP address (e.g.,
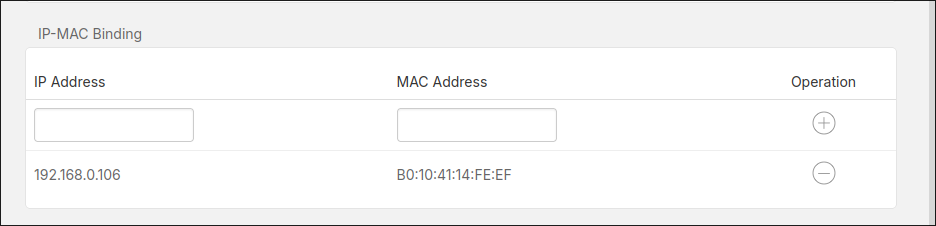
192.168.0.106).In your router’s settings, look for DHCP reservation or MAC-to-IP binding.
Add an entry using the MAC address and desired static IP, then save.
Your router will now always assign this IP to the laptop.
SSH Access
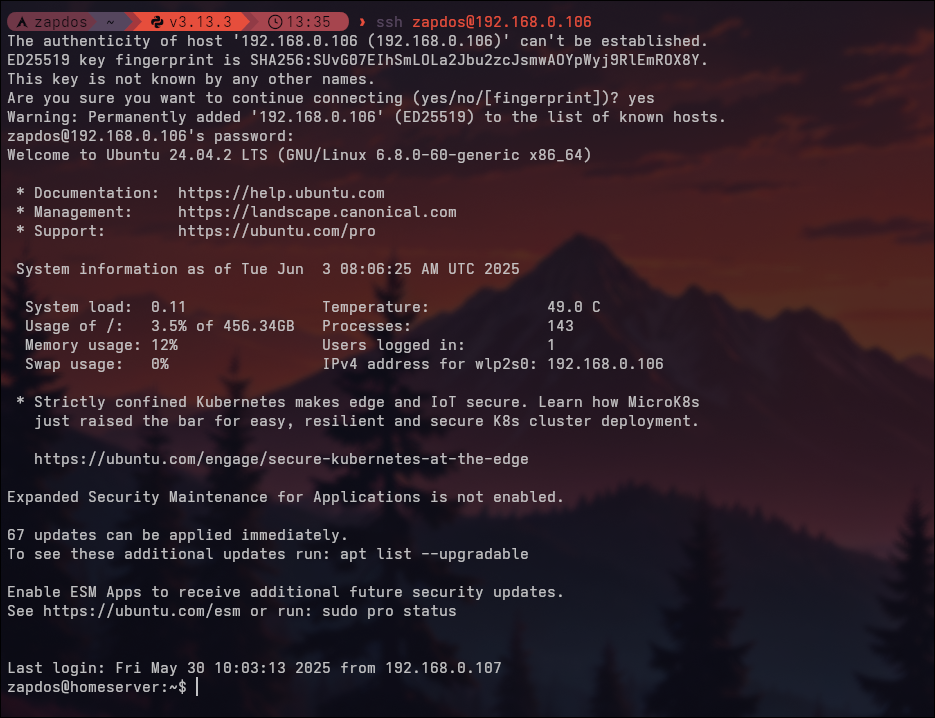
From now on, you can access your laptop remotely via SSH, as long as it’s connected to your network.
Open a terminal or command prompt and run:
Replace username with the Linux user you created, and 192.168.0.106 with your actual IP.
Enter your password when prompted (note: it won’t appear as you type).
Configuration
Since the server will run 24/7, we don’t want it to sleep when the lid is closed.
This behavior is controlled in the login daemon config file:
/etc/systemd/logind.conf
To edit it:
sudo nano /etc/systemd/logind.conf
Make the following changes:
- Uncomment the line:
HandleLidSwitch=suspend→ changesuspendtoignore - Uncomment the line:
LidSwitchIgnoreInhibited=no→ change toyes
This prevents the system from sleeping when the lid is shut.
Installing Immich
Follow the official Immich documentation to install and configure the server: https://immich.app/docs/overview/quick-start
Finishing Up
Once setup is complete, Immich should be accessible within your local network at:
http://192.168.0.106:2283
(Replace with your actual server IP)
You can also install the Immich mobile app and connect it using this URL.
Next Steps
With your server ready, here are a few more ideas for expanding its functionality:
- Host a home VPN (e.g., WireGuard)
- Set up network-wide ad blocking (AdGuard Home or Pi-hole)
- Create a media server for streaming (Jellyfin)
Explore more possibilities on Awesome Selfhosted- a curated list of self-hostable applications.